Unlock the full potential of Office 365, a powerful platform offering many valuable features to its users. Among these features, the capability to seamlessly scan documents and instantly dispatch them via email stands out. This functionality saves time and streamlines the sharing of crucial documents, establishing it as an indispensable skill for every Office 365 user. This guide will lead you through How to Scan to email with Office 365, ensuring you harness this efficient capability.
How to Scan to Email with Office 365: Table of Contents
Setting up your Scanner
Before scanning to email, you need to set up your scanner with Office 365. This process may vary depending on the make and model of your scanner. Still, generally, it involves connecting your scanner to your network and configuring it to work with your email account. You should refer to your scanner’s user manual for specific instructions on how to do this.
Configuring SMTP Settings
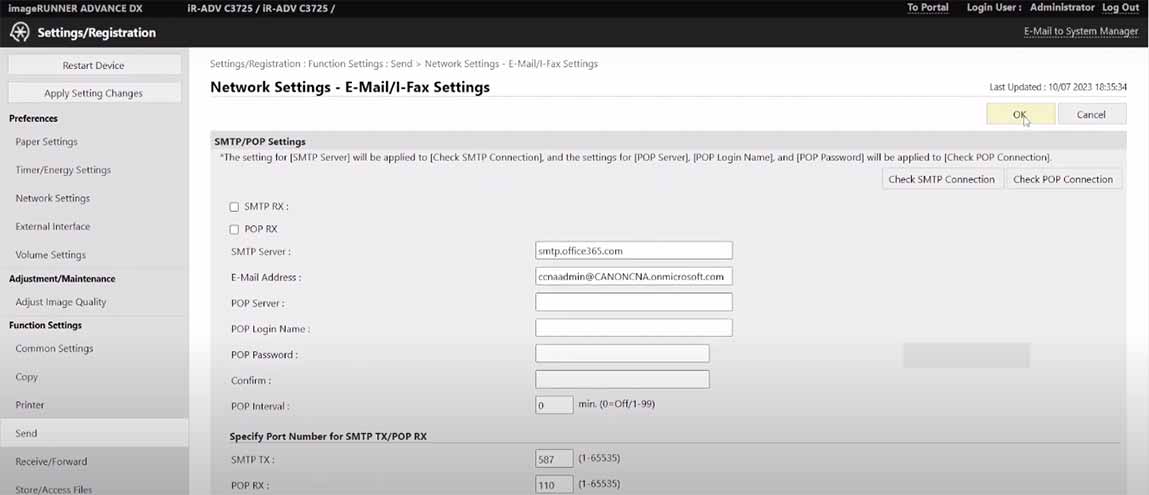
SMTP (Simple Mail Transfer Protocol) is the standard protocol for sending emails over the Internet. To scan to email with Office 365, you must configure your scanner’s SMTP settings. These settings include the server name, port number, and authentication details for your Office 365 email account. Again, the exact steps may vary depending on your scanner, so refer to your user manual for instructions.
Connecting to your Network
To connect your scanner to your network, you will need to refer to the instruction manual that came with your device. Most scanners have a built-in Wi-Fi capability, while others may require an Ethernet cable for a wired connection. Once connected, ensure your scanner is turned on and ready to scan.
Configuring your Email Account
To configure your email account with Office 365, you must access the settings on your scanner. Depending on your device, this may be done using a touchscreen display or a computer connected to the scanner. Follow the prompts to enter your email address and password, and select Office 365 as your email provider.
Scanning to Email
With your scanner set up and connected, you can now start scanning to email using Office 365. The steps may vary slightly depending on your device, but the general process remains the same.
- Place the document you want to scan in the scanner’s document feeder or on the glass surface.
- Select the “Scan to Email” option on your scanner’s computer screen.
- Choose the email address to which you want to send the document from your saved contacts list, or enter a new one manually.
- Select the file format and quality for your scanned document.
- Click on the “Scan” button to begin the scanning process.
- Once the scan is complete, please review the document on your scanner’s display or computer screen to ensure it is clear and legible.
- If satisfied, select the “Send” or “Email” option to send the document via email.
- Your scanned document will now be attached to an email in your Office 365 account, ready to be sent.
How to Scan to Email with Office 365: Tips for Successful Scanning
To ensure the best results when scanning to email using Office 365, here are some helpful tips to keep in mind:
- Make sure your scanner is connected to a stable network.
- Clean the glass surface of your scanner regularly to avoid smudges or dirt that may affect scan quality.
- Set your scanner’s resolution and file format according to your needs, as higher resolutions and specific formats may result in larger files.
- Use the document feeder for multiple pages rather than scanning each one individually.
- Preview your scanned document before sending it to ensure it is clear and legible.
With these tips, you can confidently scan to email using Office 365 and streamline your document-sharing process. Happy scanning!
Conclusion of How to Scan to Email with Office 365
Scanning to email with Office 365 is a convenient and time-saving feature that can significantly benefit any user. Following the simple steps outlined in this guide and keeping some helpful tips in mind, you can quickly scan and send important documents via email without any hassle. So go ahead and try it out for yourself – your future self will thank you! So, start mastering this valuable skill today and make the most of Office 365’s features. Keep exploring and learning new ways to maximize productivity with this powerful platform. Happy scanning!
Related posts
Recent Posts
- Data Modeling with Microsoft Power BI O’Reilly: Practical Guide, AI, and Pricing July 30, 2025
- Power BI Workspace Roles & Access Levels: A Complete, Practical Guide (2025) July 25, 2025
- How Much Is a Power BI License? 2025 Best-Value Pricing Guide for Businesses July 20, 2025
- Power Apps vs Power BI in 2025: a complete guide to choosing, combining, and scaling the right solution July 15, 2025
- Power BI Embedded Pricing: 2025 Cost Playbook for Accurate Budgets and Confident Launches July 12, 2025
Blog Categories
Product categories
Best Selling
-
 Best Design Portfolio Websites For Professionals
£49.99 – £99.99Price range: £49.99 through £99.99
-
 Quikdaz | Worldwide Software Deals | Leading Digital Services
£1,650.00Original price was: £1,650.00.£1,499.99Current price is: £1,499.99. -
 QFolio | Personal DIVI Premium Portfolio Layout Pack
£14.99
-
 The domain name & Website petoranest.com is for Sale
£599.99
-
 Print Ready Be Kind T-shirt Design Template
£4.99
-
 Print Ready Born Free, Staying Brave T-shirt Design Template
£4.99
-
 Enjoy Shopify Frist 3 Days Free Trail and 1 USD Per Month For your First 3 Months
£0.00
-
 Flatsome | Multi-Purpose Responsive WooCommerce Theme Including License Key & Lifetime Updates
£59.00
-
 Betheme | Responsive Multipurpose WordPress & WooCommerce Theme Including License Key & Lifetime Updates
£59.00
-
 Avada | Website Builder For WordPress & eCommerce Including License Key & Lifetime Updates
£59.00Original price was: £59.00.£29.99Current price is: £29.99.
Categories
Best Selling
-
 Nitro PDF Pro 14 (PDF Editor) Official License Key For Lifetime
£179.99Original price was: £179.99.£29.99Current price is: £29.99. -
 Customize Name Official Microsoft Power Bi Pro Account For Lifetime
£199.00Original price was: £199.00.£54.99Current price is: £54.99. -
 Custom Username Office365 Pro Plus 1 Account For 5 Windows/Mac/Tablet With 100GB OneDrive Storage
£79.99Original price was: £79.99.£24.99Current price is: £24.99. -
 Customize Username Microsoft Office 365 Pro Plus 1 Account 5 Device for Windows, Mac, iOS With 6 Months Warranty
£75.99Original price was: £75.99.£19.99Current price is: £19.99. -
 Autodesk 2025 All Apps -3 Years Subscription (Your Own Email Activation)
£3,599.00Original price was: £3,599.00.£175.99Current price is: £175.99.
